The Ultimate $1200 Gaming PC Build Guide
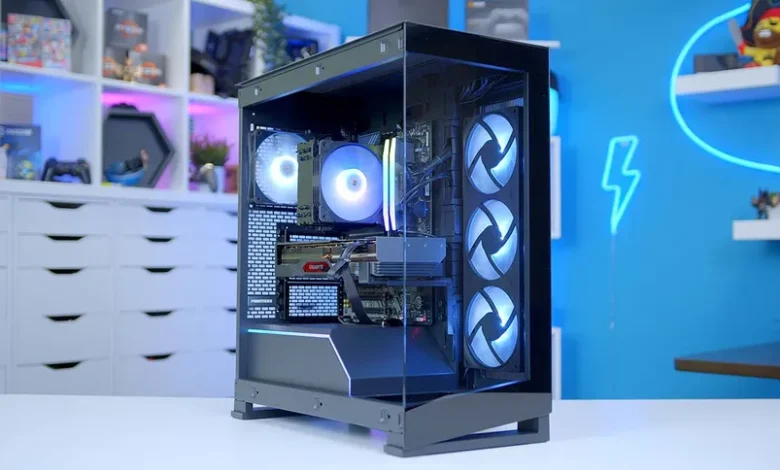
Building your own gaming PC is a rewarding experience. For $1200, you can create a machine capable of running the latest AAA games in stunning detail at 1080p or even 1440p. With a well-balanced selection of components, you’ll not only save money compared to pre-built systems but also have a rig tailored to your specific gaming needs.
In this comprehensive guide, we’ll walk you through the best $1200 gaming PC build, explaining the component choices, assembly tips, and performance expectations. We’ll also include a detailed FAQ section to address common questions and concerns.
Component Selection for the $1200 Gaming PC
A well-rounded gaming PC requires balance among the CPU, GPU, RAM, and other components. Below is a breakdown of the best components for this budget.
1. Processor (CPU)
- Component: AMD Ryzen 5 7600 or Intel Core i5-13400F
- Price: ~$220
- Why This Component?
Both processors offer excellent multi-threaded performance and gaming power. The Ryzen 5 7600 comes with an unlocked multiplier for overclocking, while the Intel Core i5-13400F provides great value for non-overclockers.
2. Graphics Card (GPU)
- Component: NVIDIA GeForce RTX 4060 Ti or AMD Radeon RX 7700 XT
- Price: ~$400
- Why This Component?
The RTX 4060 Ti excels at ray tracing and DLSS, making it ideal for gamers focused on immersive visuals. Alternatively, the RX 7700 XT delivers raw power at 1440p and high-refresh-rate gaming.
3. Memory (RAM)
- Component: Corsair Vengeance DDR5 16GB (2x8GB), 5600MHz
- Price: ~$80
- Why This Component?
DDR5 memory enhances system performance and future-proofs your build. Dual-channel 16GB is perfect for gaming and multitasking.
4. Storage
- Component: Samsung 980 1TB NVMe SSD
- Price: ~$60
- Why This Component?
Fast NVMe SSDs significantly reduce load times and improve system responsiveness. The 1TB capacity offers plenty of room for games and applications.
5. Motherboard
- Component: MSI MAG B650M Mortar WiFi (AM5) or Gigabyte B760 DS3H (LGA 1700)
- Price: ~$150
- Why This Component?
These motherboards offer excellent connectivity, support for DDR5, and upgrade paths for future components.
6. Power Supply Unit (PSU)
- Component: Corsair RM750e 750W 80+ Gold
- Price: ~$100
- Why This Component?
A high-quality PSU ensures stable power delivery and efficiency. The 750W capacity provides room for future GPU upgrades.
7. Case
- Component: NZXT H510 Flow
- Price: ~$80
- Why This Component?
This mid-tower case offers excellent airflow, cable management, and a sleek design.
8. Cooling
- Component: Stock CPU cooler or Cooler Master Hyper 212 Black Edition (Optional)
- Price: $0–$50
- Why This Component?
The stock cooler is sufficient for most non-overclocked setups. Opt for an aftermarket cooler if noise reduction or overclocking is a priority.
Build Overview Table
| Component | Model | Price |
|---|---|---|
| CPU | AMD Ryzen 5 7600 / Intel i5-13400F | ~$220 |
| GPU | NVIDIA RTX 4060 Ti / AMD RX 7700 XT | ~$400 |
| RAM | Corsair Vengeance DDR5 16GB | ~$80 |
| Storage | Samsung 980 1TB NVMe SSD | ~$60 |
| Motherboard | MSI MAG B650M Mortar WiFi | ~$150 |
| PSU | Corsair RM750e 750W | ~$100 |
| Case | NZXT H510 Flow | ~$80 |
| Cooling | Stock/Optional Aftermarket Cooler | $0–$50 |
| Total Price | ~$1200 |
Assembly Guide
- Prepare Your Workspace:
- Clean, static-free area with ample lighting.
- Gather tools: a Phillips-head screwdriver and an anti-static wristband.
- Install the CPU:
- Open the socket latch on the motherboard.
- Carefully align and insert the CPU into the socket.
- Close the latch securely.
- Attach the Cooler:
- If using a stock cooler, follow the included instructions.
- For aftermarket coolers, apply thermal paste (if not pre-applied) and secure the cooler.
- Install RAM:
- Insert RAM sticks into the appropriate slots (consult the motherboard manual for dual-channel setup).
- Mount the Motherboard:
- Secure the motherboard to the case with standoffs and screws.
- Install Storage:
- Mount the NVMe SSD onto the motherboard’s designated M.2 slot.
- Add the GPU:
- Insert the graphics card into the PCIe x16 slot. Secure with screws.
- Connect the PSU:
- Plug in all necessary cables to the motherboard, GPU, and drives.
- Cable Management:
- Tidy up cables using the case’s cable management features.
- Test and Boot:
- Double-check connections and power on the system. Enter the BIOS to confirm hardware detection.
Performance Expectations
- 1080p Gaming: Ultra settings with smooth frame rates in titles like Cyberpunk 2077 or Call of Duty: Warzone.
- 1440p Gaming: High settings in most AAA games with stable performance.
- Streaming: Handles gaming and streaming simultaneously without lag.
- Upgrade Potential: Plenty of headroom for future upgrades, such as a more powerful GPU or additional RAM.
FAQs
1. Can I use this PC for productivity tasks?
Absolutely! This build excels at gaming and handles demanding tasks like video editing, 3D rendering, and programming.
2. Do I need additional case fans?
The NZXT H510 Flow comes with decent airflow. For extreme workloads, consider adding one or two extra fans.
3. Is overclocking necessary?
Overclocking can boost performance but isn’t essential for this build. Stick with stock settings if you’re a beginner.
4. How long will this PC last?
With proper care and occasional upgrades, this build should last 5–7 years for modern gaming.
5. Can I reduce costs further?
Opt for an older-gen GPU or stick with DDR4 RAM if the motherboard supports it.
Conclusion
Building your own $1200 gaming PC is a fun and rewarding experience that delivers excellent performance for its price. By carefully selecting components and assembling them yourself, you’ll enjoy a high-performance rig tailored to your needs. Whether you’re gaming, streaming, or tackling productivity tasks, this PC build is a fantastic investment.
Take the plunge, follow this guide, and enjoy the world of custom PC gaming!
